Step by step
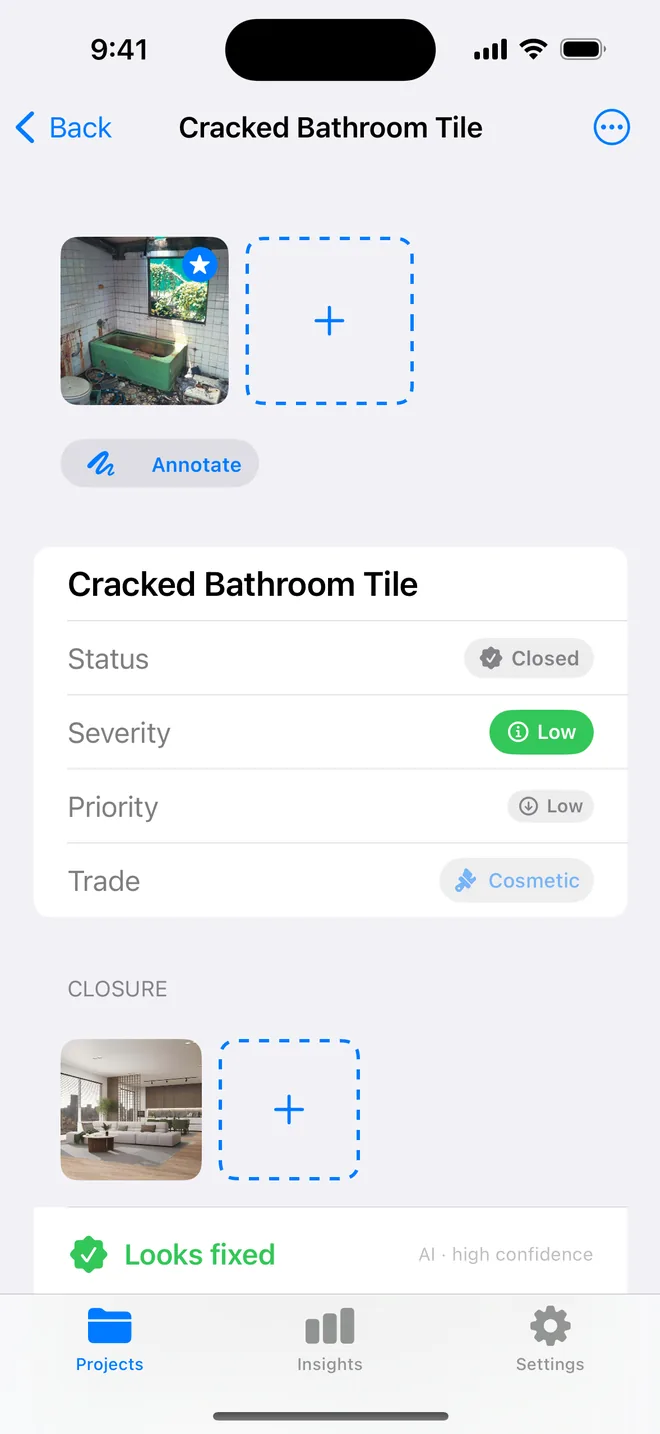
- Tap + on the project and take the photo; the item is drafted from it.
- Add more photos from the item screen, camera or library. Imported photos keep their EXIF time and location.
- Circle or arrow on the photo; the markup is a separate layer, so the original stays clean.
- Choose Large or Medium photos in Report options; the time-and-location line under each is a switch.
Related questions
Is there a photo limit?
3 per item on the free plan, 100 on Pro. Competing apps commonly cap at 1, 2 or 8.
Can I export the photos?
Yes. CSV + Photos writes a zip with every photo named after its row.
Try it on your next walk
Free to download; the first project is free for good. No account.
Download on theApp Store