
Part of the guide: The Construction Defect Field Guide: 40 Defects by Trade, With Photos
A checklist is not a substitute for judgement, but it is an excellent substitute for memory. The failures that embarrass an inspector are almost never the difficult calls, they are the obvious thing nobody looked at, because it was behind a door or above a ceiling tile or in the plant room everyone assumed someone else had covered.
This is a generic structure. Adapt it to your building type, and to the specification you are actually inspecting against.
Before anything else: inspect against the contract documents, not against your own taste. The question is always "does this comply with what was specified?", not "would I have done it that way?" The second question produces items that get rejected and undermine the rest of your list.
Before you start
- Current drawings and specification, on the device you are carrying
- The previous inspection's open items, you are back-checking those first
- Phone charged, torch, tape measure, spirit level, moisture meter if relevant
- Agreed access to every locked space, including plant rooms, risers and roof
- PPE and site induction current
- A defined naming convention for locations before you record the first item
The route
Walk the same order every time. A consistent route is what stops you missing things, and it makes your reports comparable across projects.
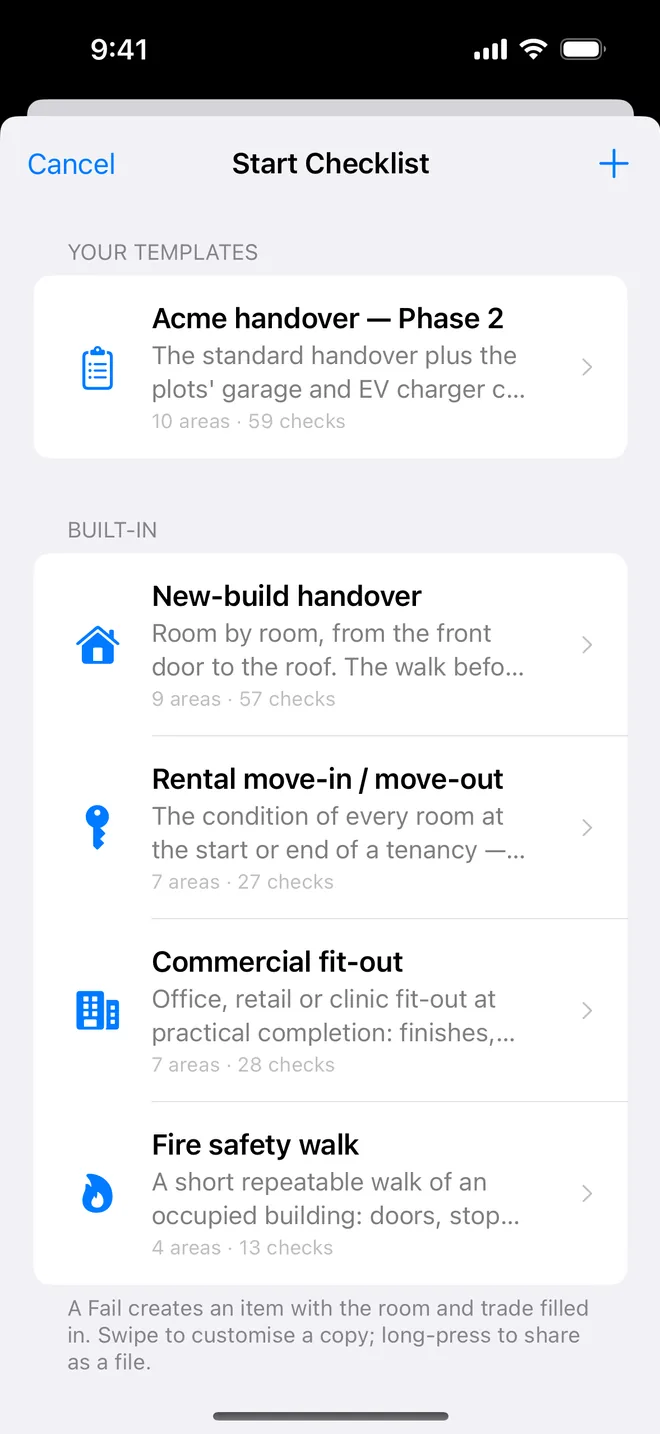

The order that works for most buildings: outside in, top down, wet rooms last. External envelope and roof first while the light is good, then the top floor down to ground, then plant and services, then back through wet areas which need the most time.
1. Structure and substrate
- Cracking in walls, slabs and ceilings, record length, width, direction and location relative to openings
- Deflection in floors and ceilings; visible sagging
- Exposed reinforcement, spalling, honeycombing in concrete
- Movement joints present, continuous and correctly filled
- Steelwork: fire protection intact, connections complete, corrosion
- Timber: moisture staining, splitting, fixings, notching of joists
- Floor level and flatness where the finish requires it
Cracks are the item most often recorded badly. "Crack in wall" is useless; direction and location relative to openings is what tells a structural engineer whether it is shrinkage or movement.
2. Building envelope
- Roof covering: laps, fixings, ponding, debris, blocked outlets
- Flashings, upstands and terminations at every penetration and abutment
- Rainwater goods: falls, joints, discharge, brackets
- External walls: pointing, render cracking, staining, movement joints
- Cladding: alignment, fixings, gaskets, sealant continuity
- Window and door perimeter sealant, continuous, tooled, correct material
- Damp-proof course and cavity trays visible where they should be
- Insulation continuity at junctions, and evidence of thermal bridging
- Signs of water ingress internally at envelope junctions
3. Mechanical, electrical, plumbing
Electrical
- Distribution boards: labelled, schedules present, covers fitted, no exposed conductors
- Accessories square, level, secure; correct type in wet and external locations
- Circuits energised and tested; test certificates available
- Emergency lighting present, correct locations, tested
- Containment supported, bonded, fire-stopped at compartment lines
Mechanical / HVAC
- Plant labelled, accessible, with maintenance clearance
- Ductwork sealed, supported, insulated where specified, cleaned
- Grilles and diffusers aligned, balanced, commissioning results recorded
- Condensate drainage run and terminated correctly
- Controls installed, labelled, and demonstrated to work
Plumbing
- Pipework supported, insulated, labelled with flow direction
- Isolation valves present and accessible for each fixture group
- Traps fitted, correctly sized, and holding water
- No leaks under load, run everything, do not just look
- Hot water temperatures and any anti-scald measures verified
- Falls to gullies and floor drains; test with water rather than assuming
4. Internal finishes
- Walls: flatness, joint visibility, nail pops, damage, paint coverage and consistency under raking light
- Ceilings: alignment of tiles/grid, gaps at perimeter, access panels present and openable
- Floors: level, lippage between tiles, grout condition, transitions and thresholds, expansion joints
- Skirtings and architraves: mitres, gaps, fixings, scribing to uneven floors
- Tiling: setting out, cut sizes at edges, movement joints, silicone at all internal angles
- Joinery: alignment, gaps, drawer and door operation, edge finishing
- Sealant lines everywhere: continuous, tooled, correct colour and material
Use raking light. Hold a torch flat against the wall and defects invisible under ambient light appear immediately: this single technique finds more finish defects than everything else combined.
5. Doors, windows and ironmongery
- Every door opened, closed and latched. Every one.
- Gaps consistent top, sides and bottom; door does not bind or drop
- Closers adjusted, hold-opens working, fire doors self-closing fully into the latch
- Fire door certification labels present and legible; intumescent strips continuous
- Ironmongery: correct schedule item, fixed securely, operates without force
- Locks keyed to the agreed suite; keys handed over and logged
- Windows: open, close, lock, restrictors fitted where required, drainage slots clear
- Glazing: scratches, marks, correct specification, manifestation where required
6. Safety and compliance
- Fire-stopping at every service penetration through compartment walls and floors, photograph each one
- Fire alarm devices installed, correct type and location, tested
- Escape routes clear, signage present and correctly oriented, final exits open freely
- Handrails and balustrades: height, gap dimensions, fixings, load resistance
- Guarding to level changes, roof access, plant areas
- Slip resistance where specified, particularly on ramps and wet areas
- Accessibility: clear widths, thresholds, turning circles, reachable controls, contrast
Fire-stopping deserves particular attention because it is covered up quickly and expensive to expose later. Photograph every penetration before the ceiling closes, and treat a missing photograph as a missing installation until proven otherwise.
7. External works
- Paving: falls away from the building, levels at thresholds, trip hazards
- Drainage: gullies clear, covers correct level and type, chambers accessible
- Kerbs, edgings and line markings
- External lighting: operation, aim, controls
- Landscaping and soft works per drawing; irrigation working
- Boundary treatments, gates, access control
8. Documentation
The part everyone skips and the part that delays handover most often:
- O&M manuals complete and indexed
- Test and commissioning certificates for every system
- Statutory approvals and completion certificates
- As-built drawings reflecting what was actually installed
- Warranties and guarantees registered in the client's name
- Asset register and equipment schedules
- Keys, fobs and access codes logged and handed over
- Spares and attic stock delivered and stored where agreed
The items inspectors forget
In rough order of how often they surface after handover:
- Above ceiling tiles: nobody lifts them, and everything is hidden there
- Inside cupboards, risers and service voids
- The roof, when access is inconvenient
- Behind doors that stand open all day
- Plant rooms after the commissioning engineer has left
- Door bottoms and thresholds
- The back of the building where nobody walks
- Anything that requires running water for more than thirty seconds
- Ceiling access panels: present, but painted shut
- Meter cupboards and external service enclosures
Work the checklist with your camera instead of a clipboard
Photograph what is wrong as you find it and Punch List AI writes the item, location-aware description, severity, category and recommended fix, before you have walked to the next room.
Get the free appQuestions people ask
How long does a handover inspection take?
Two to three hours for a typical house if you follow a route; longer if you improvise. Apartments are faster, but check the common areas too, because they are what the managing agent will chase later.
What tools should I bring to a site inspection?
A torch, a spirit level, a tape, a moisture meter, a socket tester, painter's tape for marking, and a phone with a full battery. The phone does the photographs and the notes; the report is where the time goes afterwards.
Do I need a checklist if I have done hundreds of inspections?
Especially then. Experience finds the interesting defects; the checklist finds the boring ones you have stopped seeing, like the return vent nobody cleaned. The client notices the boring ones.